
Squarespace Tutorial -How To Create An Instagram Bio Link Page On Squarespace

How To Create Your Own Instagram Link Page On Squarespace
In this tutorial, we’ll learn to create an Instagram Bio Link page that is similar to what’s available on Linktree but hosted on your very own Squarespace website.
Why would you want to do this?
Although Linktree does offer a free version, it’s quite limited when it comes to branding. You have a selection of a few basic colours and if your brand has a distinctively different colour scheme, it just won’t work for you.
Also, there are cool snazzy options for the paid version of Linktree, but not on the free one but guess what? You can just create a links page on your site that will do the job even better than a third-party provider AND you will be able to track analytics on the page to see the number of clicks and any other metrics in Google Analytics or the analytics section of your Squarespace site.
Step 1
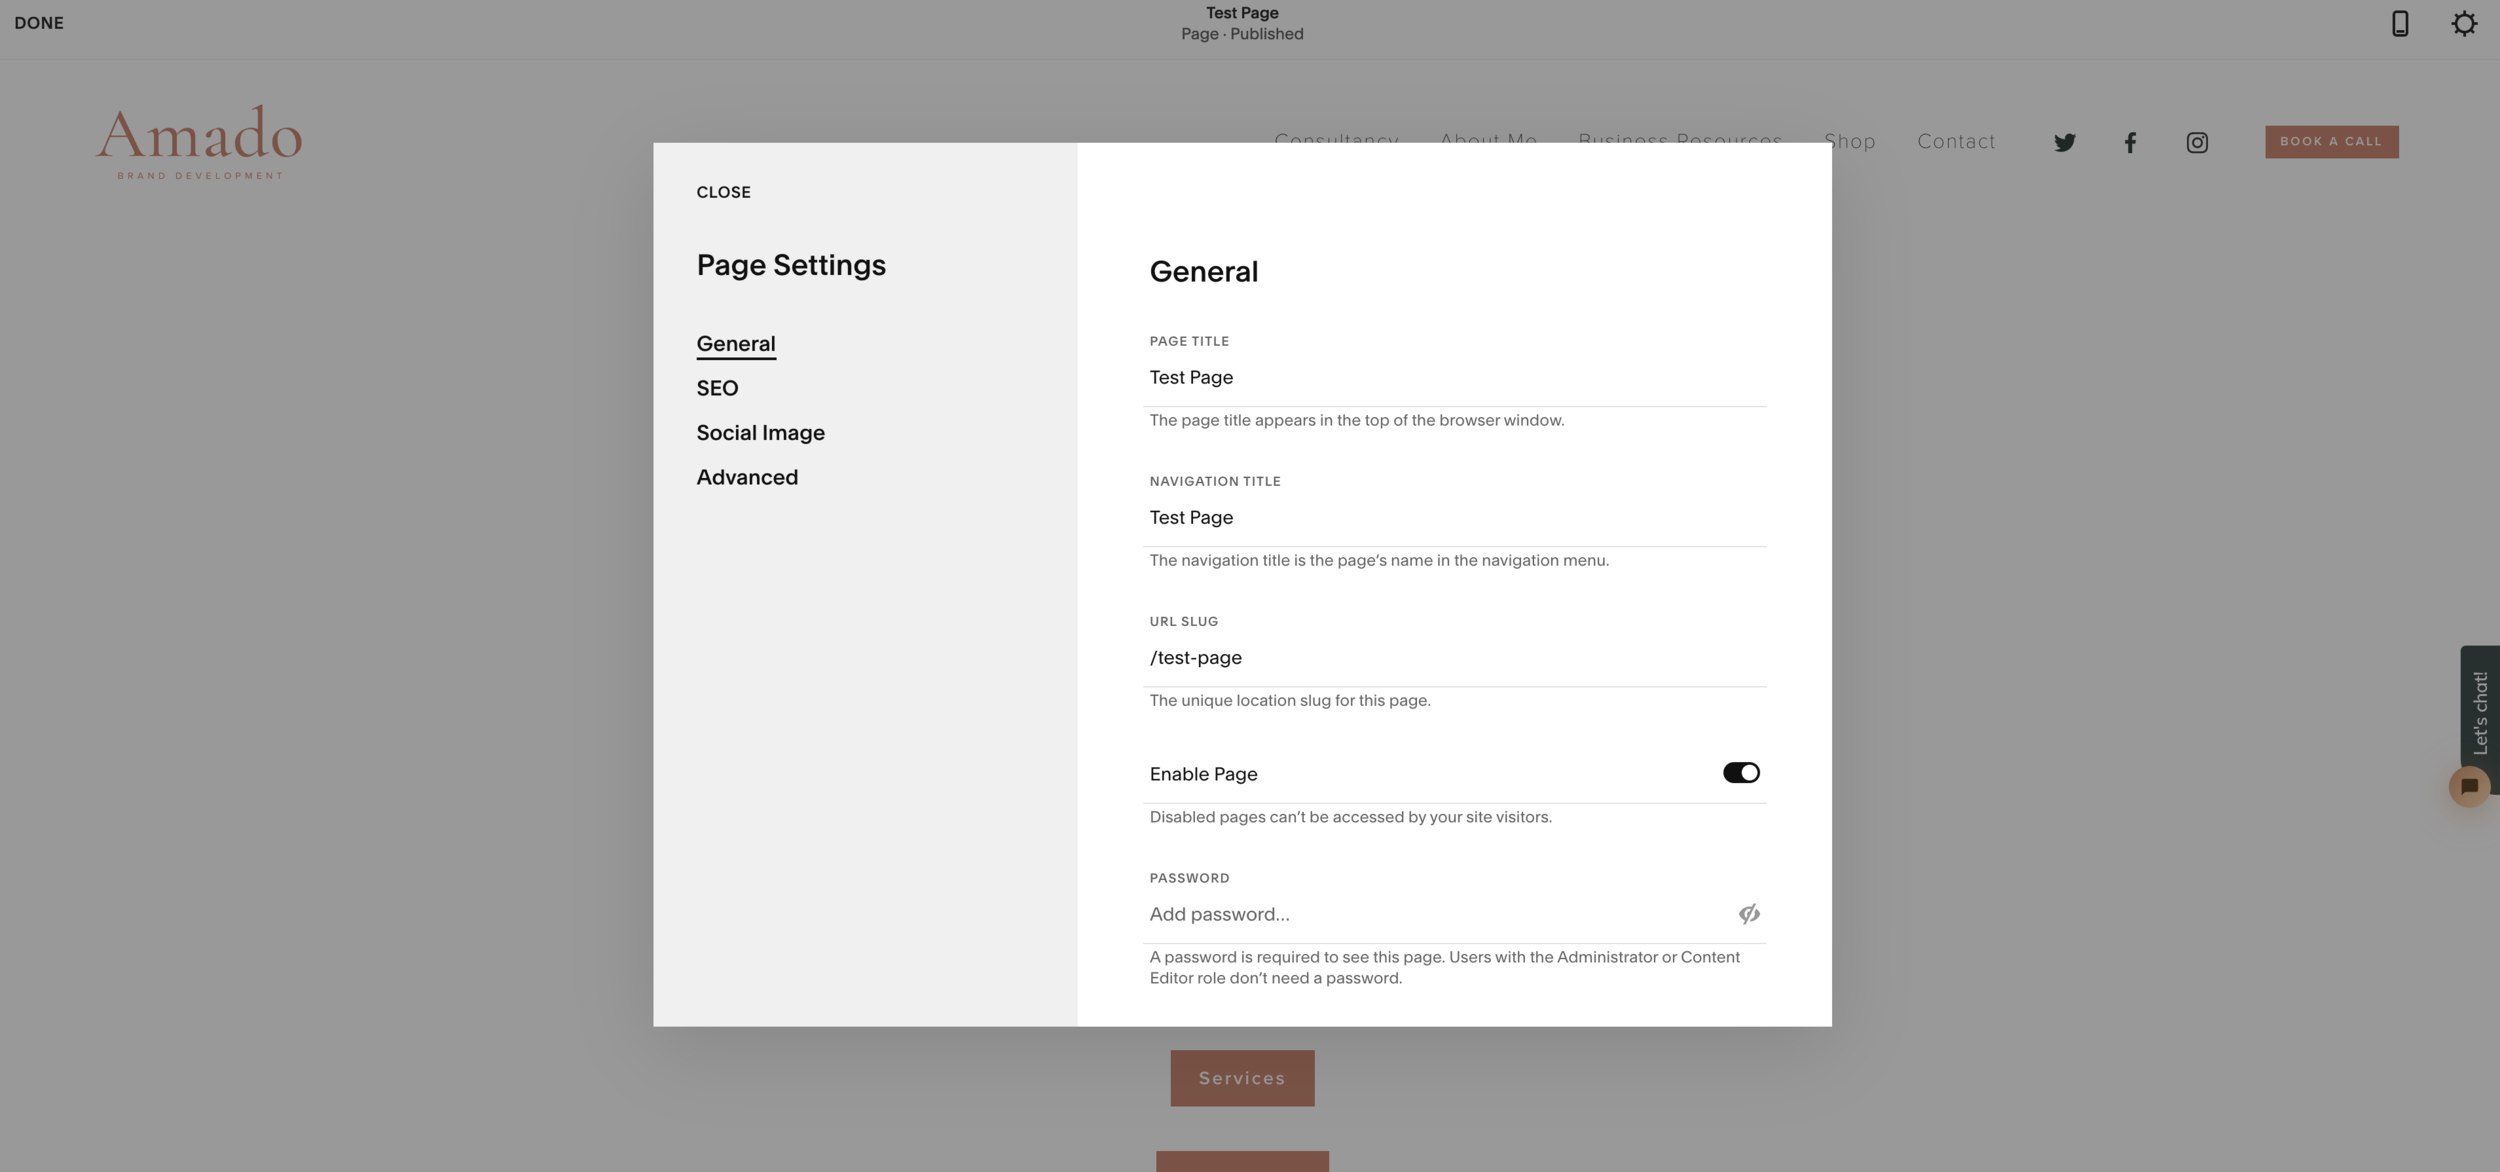
Open the Squarespace page you’d like to nominate as your links page.
On the middle of the page, add a few buttons and link them to the pages you’d like to have in your Insta menu. Include your logo as well if you want to - don’t worry about resizing it as the code we’re using will do that for us.
Step 2
Highlight the code below and click copy:
<style>.header, #footer-sections {display:none!important;}</style>
<style>.sqs-block-button-element--small {
width: 70% !important;
}</style>
<style>.sqs-block-button-element--medium {
width: 70% !important;
}</style>
<style>.sqs-block-button-element--large {
width: 70% !important;
}</style>
<style>.sqs-block-image {
width: 40%;
margin: 0 auto;
}</style>
Step 3
Go back to your Squarespace page.
Click on the Advanced option.
Paste the code in the Page Header Code Injection field.
Hit Save.
Step 4
Hit Done on the top left corner.
Your page should now have no Header or Footer and your image is now in the middle, remains the same size on mobile as well as desktop. It also unifies the size of the buttons so now they’re the same width, no matter how long the text on that is.
Code Variations
If you only want to remove your header, you should copy and paste this code:
<style>.header, #footer-sections {display:none!important;}</style>
If you only want to remove your footer, this is your code variation:
<style>.header, #footer-sections {display:none!important;}</style>
If you only want to make sure that all the buttons have consistent style, but no other changes on the page, use this code only (3 variations of code to cover 3 sizes of images available in Squarespace)
<style>.sqs-block-button-element--small {
width: 70% !important;
}</style>
<style>.sqs-block-button-element--medium {
width: 70% !important;
}</style>
<style>.sqs-block-button-element--large {
width: 70% !important;
}</style>
This is the code to keep the image size the same:
<style>.sqs-block-image {
width: 40%;
margin: 0 auto;
}</style>

Open the page you’d like to edit
Click on the Settings button on the top right corner

Click on Advanced and paste the code from above

Click Done on the top left corner and you should see your page without a header and footer

YouTube Tutorials
Watch more tech tutorials on our YouTube Channel.


